
Much to my husband’s chagrin, I’m one of those people who got the frugal gene.
Okay. To be clearer, I’m cheap.
I hardly ever buy clothes for myself. And if I do, it’s from an online sale or it’s post-season and retail stores are having a huge clearance event.
Coupled with my tendency to be cheap, I have an obsession with home decor. I LOVE the hunt of finding a diamond in the rough and the satisfaction of making it fit into our existing home decor vibe.
The plus side of this is that it’s resulted in some really cute, inexpensive items that fit perfectly into our home and naturally complement their surroundings.
The negative side is that, if left unmanaged, I can come home with a pile of mismatched knick knacks that don’t really mesh together and end up in a tote headed back to the thrift store 6 months later.
Great intentions, bad execution. (Oops.)
Once in awhile, though, I stumble on something truly special. Fellow thrifters, you know what I’m talking about.
That ONE piece that catches your eye from across the store…
It’s dusty, it’s outdated, and it’s hidden underneath a crate of VHS tapes BUT MY GOD it’s beautiful and DYING for you to give it new life.
That’s the exact feeling I had when I stumbled upon this white wooden sleigh at my local Goodwill.

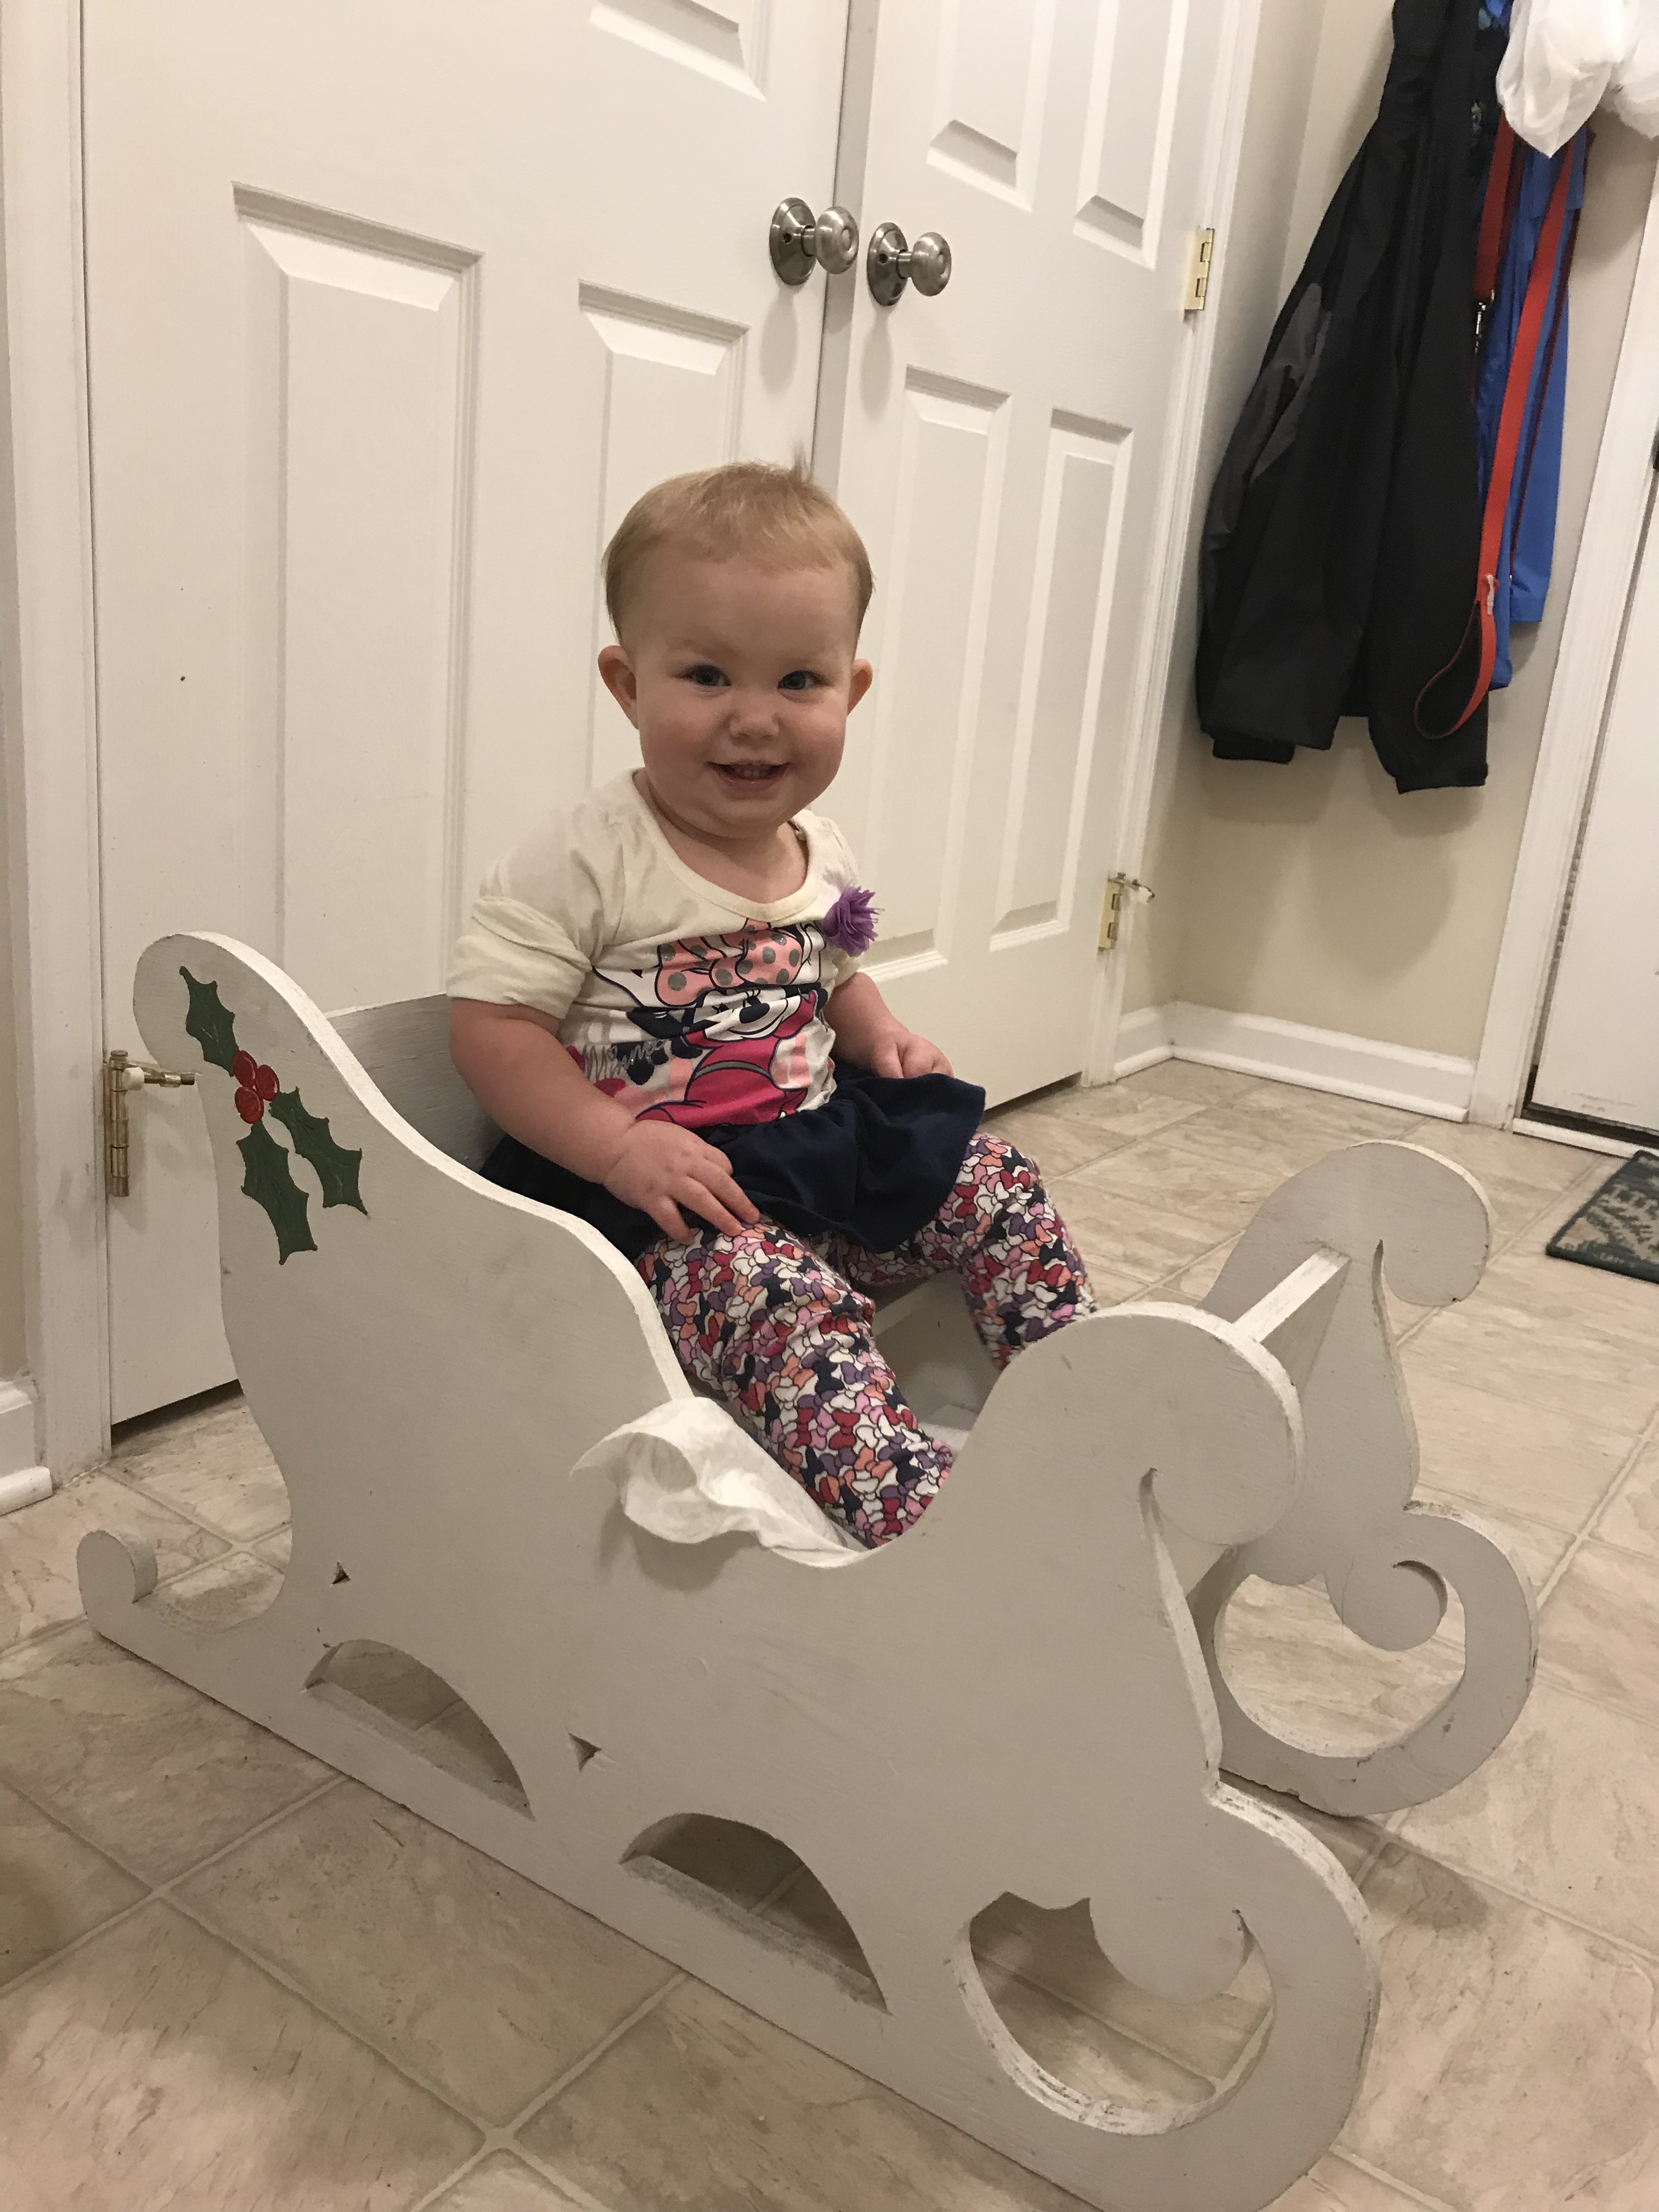
For $3.99, I had to have it. It wasn’t optional. I immediately pictured my toddler sitting in it for holiday photos, nestled in a few inches of fresh snow or tucked beside the decorated Christmas tree.
So I lugged it into my trunk and as soon as November rolled around, my husband and I got to work.
We started by sanding it down to smooth it out and remove some of the white paint.


We wanted it to look cheery and natural but not tacky. We went with a cherry red for the exterior and a metallic silver for the bottom.
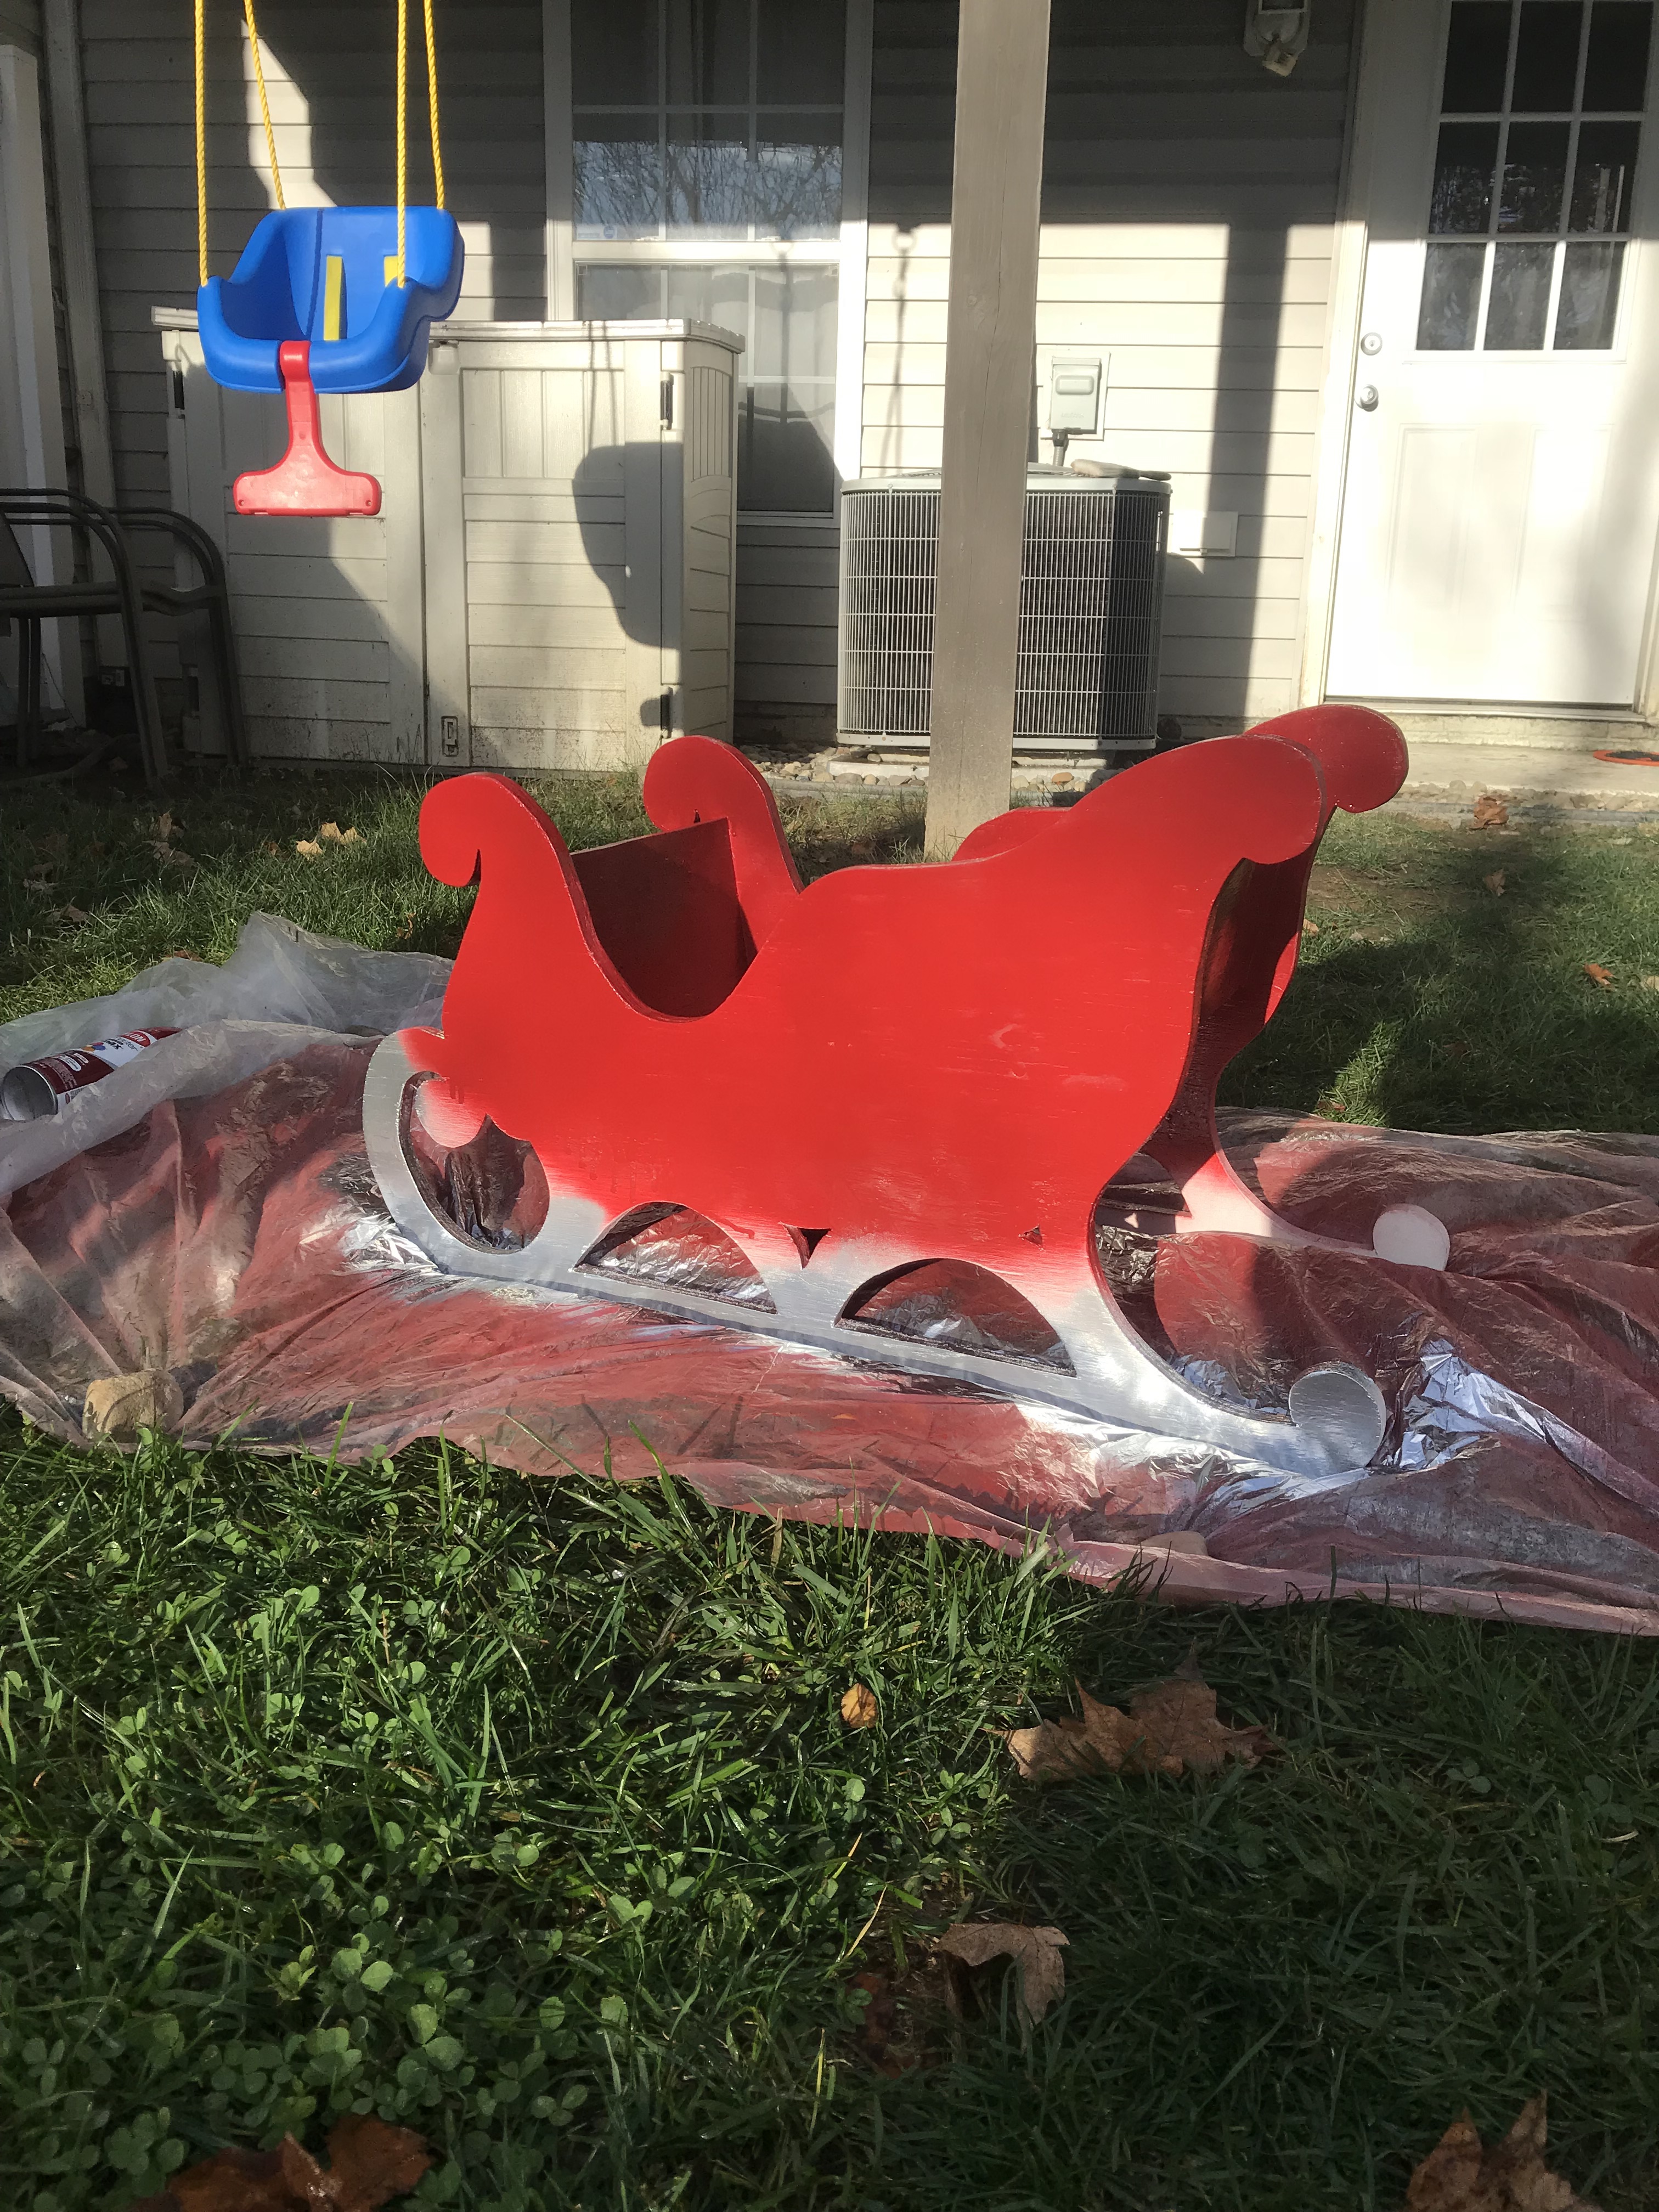
To really make the colors pop, we outlined the freshly spray painted piece with a thin black line. In my opinion, it helped break up the two colors that inevitably ended up blending together in certain areas (we are no experts here). I think it also added some much needed definition.

The end result was honestly better than expected. I am LOVING this piece, and so is my girl.
With the initial purchase plus the cost of craft supplies, this project ended up being less than $15.

My little girl loves climbing into this sleigh and gifts us the proudest, most ornery smile when she’s perched inside. My mind wanders picturing all of the holiday memories that will be made with this sleigh in our home as the years go on and our family grows.
I can see myself touching it up as the years go on, and adding new features here and there. Maybe I’ll pop a wreath on the front or add some cozy, festive designs on the side. But for now, it’s perfectly imperfect.
For $15, it feels like a steal. I see it sitting beside our tree for years to come–and that, in my opinion, is priceless.
What are some of your favorite DIY projects that originated with a must-have thrift store purchase? I would love to see some of your photos!
Love and awkward hugs,
Britt ❤️

I love what you did with the sleigh, that’s a gift your little one will treasure. I wasn’t born with the frugal gene, necessity demanded it, and I obliged as long as I had to. We’re currently selling or giving away everything in our home, getting ready for a drastic downsize, so I’m not sure if any of my thrift store makeovers still exist, if I see any I will post them. I collected most all of my cast iron collection from rusty piles of 25cent rejects at thrift stores and like you, when my children were small most of our clothing came from those shops too.
LikeLike
Yes, please do! I love seeing what others come up with. And cast iron—why didn’t I think of this? Adding this to my list of things to look out for. Thanks so much for sharing. ❤️
LikeLike
You can actually make money by cleaning and reselling the old cast iron.
LikeLiked by 1 person